
Gardens are great. Fun to grow, fun to harvest, fun to design, and yes, fun to decorate.
While putting the gardens and landscape together, one of my aims was always to have a nice place for relaxing and entertaining. Our deck works perfectly for this, and it occurred to me that a solar chandelier would be a perfect addition for those quiet evenings spent sitting around chatting.
But one drawback to garden decorations? Price. I did see a number of nice solar chandeliers for sale, but none of them fit within what I was willing to pay.
Happily, I can be a resourceful creature and set about making my own. This is how I did it in one day, and how you can do it too.
1) Locate a simple chandelier
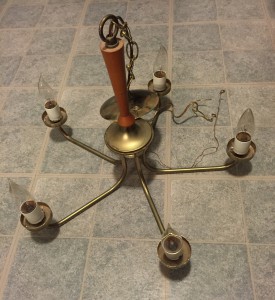
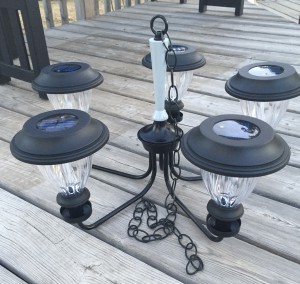
You don’t need to be fussy on this part. Color is not that important because you can easily change it. What you do need is one that cups UNDER the lights, not one that has them hanging down below the arms. And a main metal structure is best since it will be out in the elements.
What I found was this little gem in an second-hand thrift shop for about $6. It’s not pretty to look at, but when you look with your imagination eye, the possibilities pop right out 🙂 My opinion was the less parts to deal with, the better. But you might have some other great creative idea, so don’t be held back by mine.
2) Take EVERYTHING apart
This is the start of the fun. You won’t be needing any of the electrical parts anymore, so disassemble everything. Remove the wiring, the sockets, and separate the parts from each other so they will be easier to fix up or change colors on.
If you have a more complex chandelier, you might want to take photos of the process so you know how to put it back together later 😉
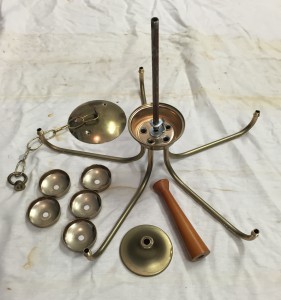
For me, I was left with a few pieces of brass, and a wooden post.
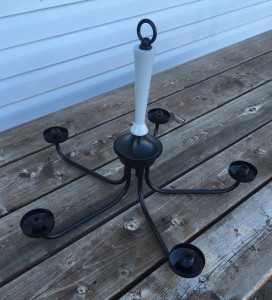
3) Fancy things up
I opted for the low-cost, cheap, fast and easy way. Exterior spray paint.
This I thought would help it match my garden and deck decor, as well as freshen things and keep the parts from rusting.
I opted for dual tone, black and dove grey. Essentially the same two tones I have throughout the gardens. Why change it if it works, right?
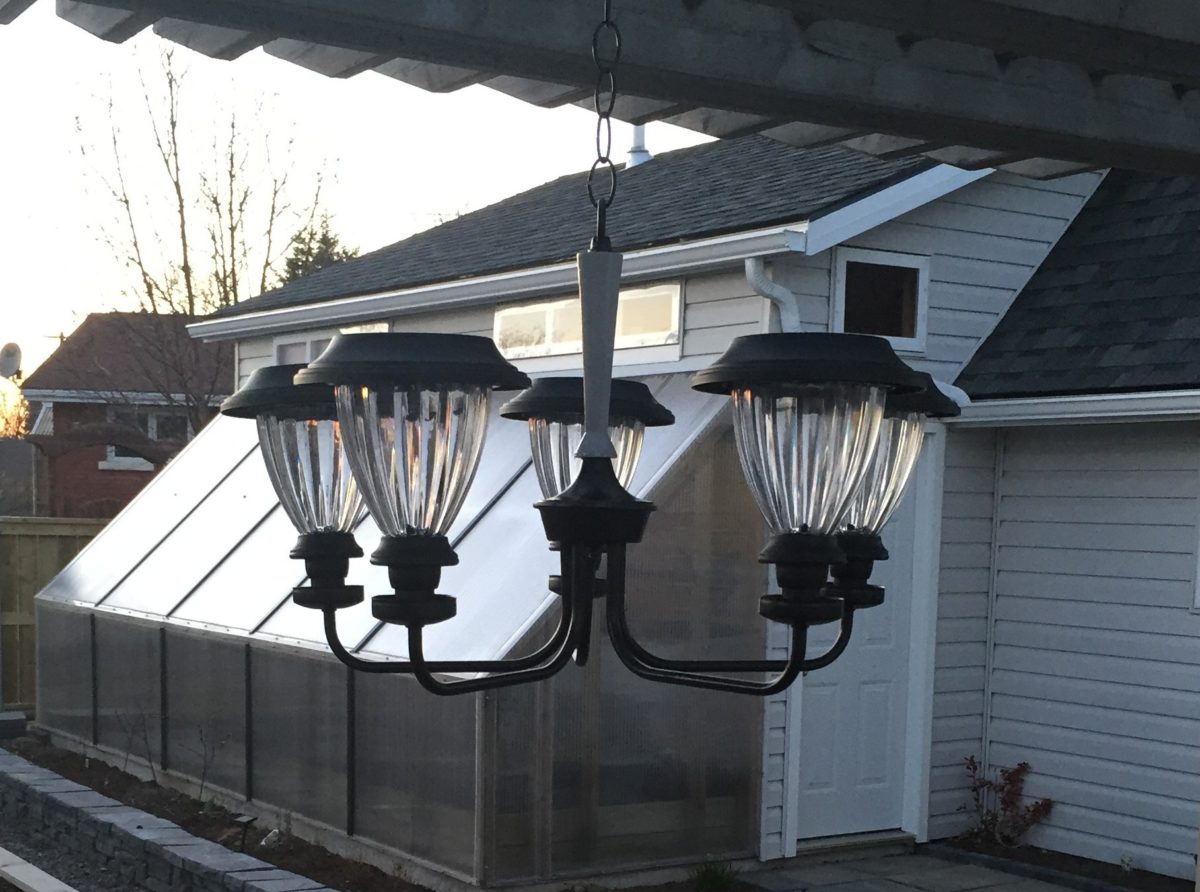
4) Re-assemble, add solar lights
When I bought the chandelier, I also bought a package of low-cost path lights. Ones with a separate post so I could make use of only the light portion.
To attach them, I took one of the lights with me and wandered the plumbing aisle. There I found adaptors that screwed onto the upturned chandelier posts, and went to a wide enough diameter to slip the solar light over. Since your chandelier will probably have different sizing, you may have to do the same. For some added tightness in the fit, I wrapped each adaptor with a double-sided foam tape before sliding on the light. Easy.
5) ENJOY!
Hang your new, low-cost DIY GORGEOUS chandelier in your outdoor living space, sit back, and enjoy.
Did I miss some details? Feel free to drop a comment and ask. I’ll do my best to answer and help out.
NICE!!!!!!!! Great idea.