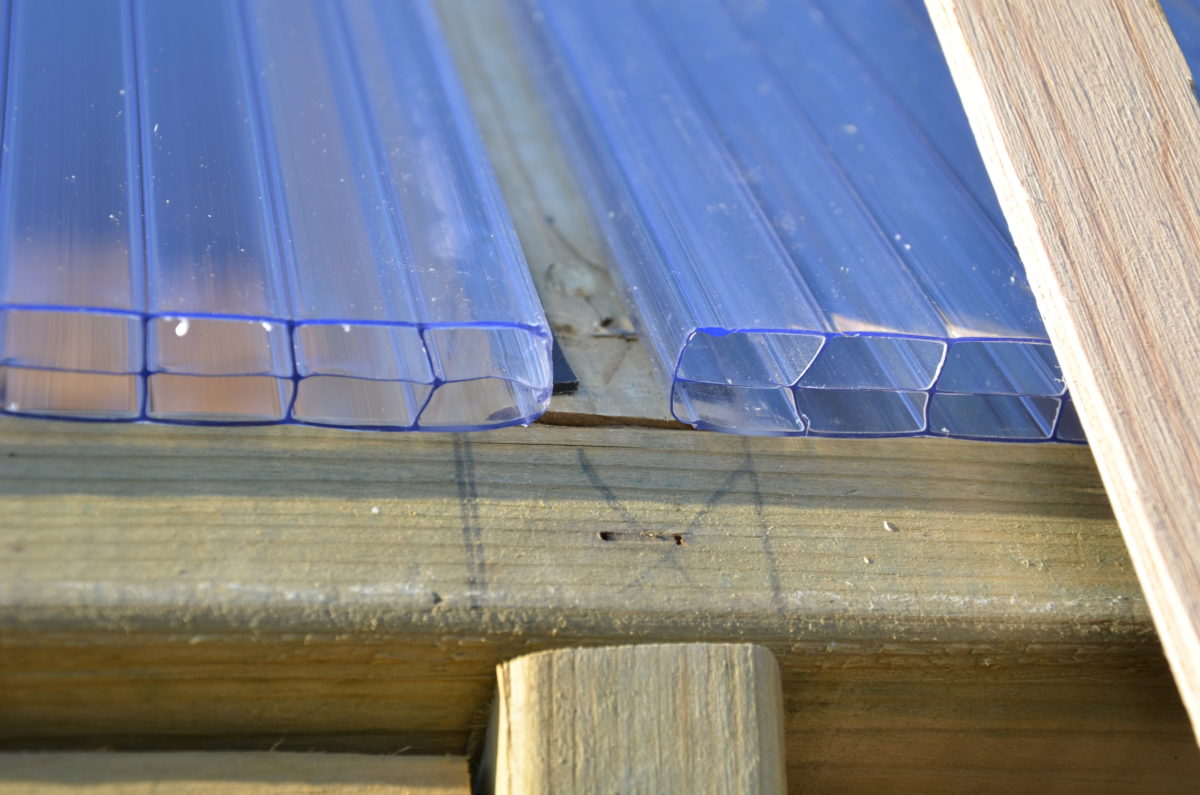
As tempting as it would be to insulate every portion of the winter greenhouse to make sure the plants stay as warm as possible, they also need light to reach them. And that means choosing a proper glazing material.
Unlike a summer greenhouse that has glazing on all areas, northern winter sun only comes from a limited south-facing zone. Which means – “glazing goes here, but not everywhere”. I see this as a WIN. More insulation for the rest of the walls where glazing would not only be useless, but also a heat-losing thorn.
But I digress – this is a post about how to install the polycarbonate, NOT about insulation.
There were a number of choices available for the south sun wall. Single, double, triple and “X” walled polycarbonate, and all types of double or triple pane glass with or without their own special films and gas fillings. When I considered cost factors, and installation, I quickly moved to the polycarbonate options. As awesome as Argon-filled triple-pane glass would have been I could not justify the cost for my experimental greenhouse, and I just could not see me being able to install anything that HEAVY.
I finally settled on clear 16mm triple-wall polycarbonate from The Polycarbonate Store, a division of Charley’s Greenhouse.
Although not quite as wonderful as the argon-filled windows, it could still provide a respectable R-factor of 2.5 and light transmission of 74%. I could have gone one step higher to the X-wall polycarbonate, but would have only gained an R factor of 2.78 and a large loss of light transmission (60%). Since plants need light, a scare winter resource to start with, it just didn’t seem worth it. Plus, I’m hoping that the R factor and transmission turns out to be a larger help to prevent overheating when I try to re-purpose the greenhouse to summer use!!
Installation:
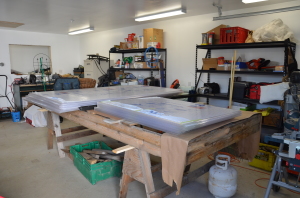
You’re going to need a few things before you get going on installing your polycarb.
Depending on which polycarbonate you’ve chosen, this list may vary, but overall you will need your polycarb panels, specialty screws, caps and end-caps, rubber seals, and appropriate silicone sealant.
Also, notes and tips before you do anything:
1) Be SURE to store your panels in a cool, dry location away from sun. If you store them in the sun, you may never get the protective film off.
2) Don’t remove the film until you are installing the panels. It clearly indicates which side should face the sun and which should not. Plus….it protects them 😉 . One side of the film with printing (or sometimes blue if there is no printing) is the UV protected side, so keep in mind this faces the sun when installed.
3) Double and triple check that the silicone you are going to be using is compatible with the polycarbonate you are using. And if you are going to install multi-wall panels, be sure to never apply the silicone so it enters the channels.
1) The Frame:
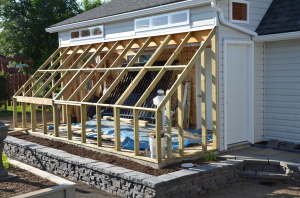
Just like glazing, there are tons of options for the framing material. I went with pressure treated 2×4 construction since the triple-wall polycarb is not heavy but I expect a lot of moisture build-up, especially through all the winter months.
One interesting thing is, you try NOT to drill through the polycarb for most of the entire installation. It needs a good bit of “wiggle” room to expand and contract with heat and cold shifts, and every screw that goes through it prevents that. So keeping this in mind, the studs needs to be spaced accordingly. I was using 4-foot panels, so the spacing I needed was between 24 -24.5″ on center. You’ll also notice there is cross blocking half-way up the angled wall. You’ll need to put this in 4-6 feet between the Ridge and Eave (also, in any walls over 6 feet tall).
Since I was not taking the greenhouse wall all the way to a peak, more a lean-to style install, I had to consider the flashing. It was MUCH easier to install everything above before the glazing, and so I made sure to place a temporary spacer the same thickness as the polycarb beneath it. This was taken out for the install.
2) Polycarbonate prep and placement
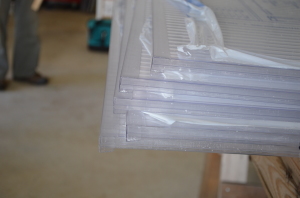
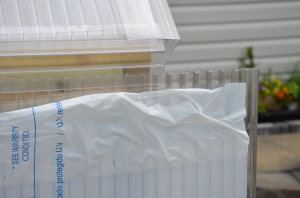
I went with the plastic end-caps to seal the open ends of the panels. There are other options like a special breathable tape, so take a look and choose the method that works best for your greenhouse.
You will need to peel back the protective film slightly from both sides to apply the caps.
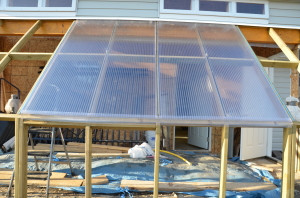
I started the placement of panels from the middle out on the main greenhouse wall. Between the frame and the panel a foam sealing tape gets applied, which buffers the panel from damage or stress, seals the area, and also allows that “wiggle” for expansion. You’ll see in the photo I started out applying all three strips to the frame. I quickly learned that it worked much easier to apply only the CENTER tape strip to the frame, and the two edge strips to the panel after peeling off the inside protective film. MUCH easier (learn from my mistake 😀 ).
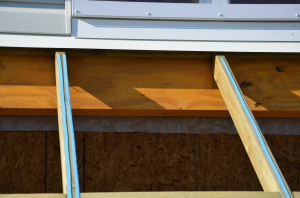
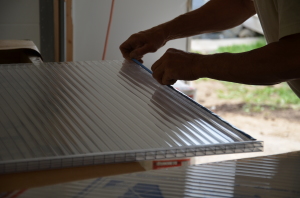
The panels get installed, with enough space between them for a screw (they are not touching or tight to each other).
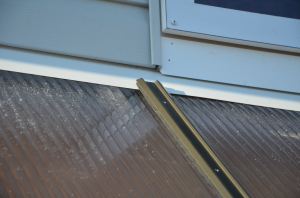
Panels were pushed under the flashing, then lifted away from the framing to peel the sealing tape backing, before being pushed down in place.
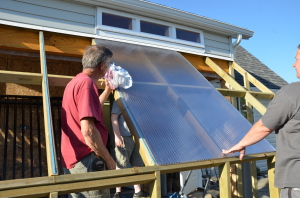
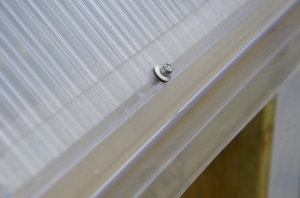
The protective film from the UV side was then removed, and one single screw with a mushroom rubber gasket was placed in the middle. I made sure to drill the hole slightly larger than the screw to again allow for expansion. This is the north, temperature shifts can be pretty extreme every day 🙂
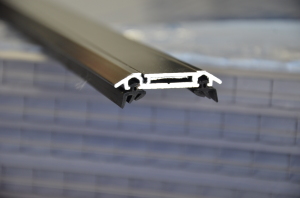
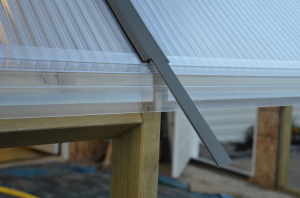
To deal with the transition from angled to vertical, ridge caps were used. Recall how very few screws go through the panels themselves? You’ll notice in the photo, that there is a gap inside the cap at the end of the panel. The screw is put between this space to hold everything in spot. The same happens at the bottom of the vertical panels, a space that the screw goes through, avoiding the panel.
When the aluminum bar cap is applied, make sure it goes over any end caps and in my case the flashing edge. The screws to hold it down will not go through the panel, and will be tightened enough for a good seal but not enough to damage the polycarb.
Once all is installed, the silicone sealant needs to be applied in a fine bead along the edges of the end-caps (not never inside the multi-wall channels).
I’m sure I missed some details that people are wondering about, so ask! If I can help, I’ll be sure to try 🙂
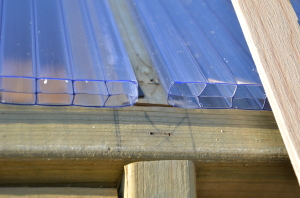
PS. Although less detailed, The Polycarbonate Store does have some instructions, with simple line drawings HERE

What an amazing little and complex structure you have created! Very inspiring! I wish I had seen this five years ago when I built my shop. Great job!
Thanks! Are you thinking to add one on now?
Thank you for sharing this record of your greenhouse build. I have been doing some research into doing something like this and your site has been most helpful since I am also growing in a very cold zone.
Additionally, I have been doing some research into growing indoors in the winter to facilitate food security. I see that has also been an interest for you. If you would be interested in collaborating on this interest please email me.
You may include my website URL in the posted comments, but would appreciate if you did not publish my email,
Thank you so much for sharing this. It’s been very useful. I’m building a lean to greenhouse. Hope you are getting many, ma u hours of pleasure from your build. Thanks
Hello,
Thank you for the write up!
Question: Looks like you used poly drip edge on the front overhang. I don’t see this listed on the Charlie’s greenhouse site.
What product did you use and from where did you purchase?
Thank you!!
Thanks for all the info. I’m trying to build a large green house too and keep referring to your photos and details. Got a couple of questions for you:
When two 4’ panels are installed side by side how did you screw down the aluminum bar over the gap between them? I’m trying to visualize how to climb up there to install the upper screws. Each bar probably has 5-6 screws with the upper ones out of the reach. Is it possible to lean a ladder on the polycarbonate without damaging it?
As I understand it plastic end caps are tough to install. Is it possible to heat them up slightly without damaging them?
Thanks in advance.
Hi Jim, sounds like a fun project.
To reach the taller areas on the bars, I wrapped a piece of 2×4 with soft carpet (foam or deep cloths would work too, maybe even an old pillow!) to make it smooth, cushioned and not rough. I attached this onto the ext ladder where it would lay against the polycarb, above where I would be standing, and made sure to center the ladder on the aluminum bar (so it would be well and evenly supported by the wood beneath), then was just slow and gentle as I worked to add in the screws.
I didn’t heat up the end caps, but it might be worth a try. My suggestion is use a cut off waste piece if you have one to test on first since I really don’t know how the material would respond to heat in that manner.