
Like all buildings, the first portion of the project once I knew what I was going to be building was to get the foundation going.
Without getting into details, getting the building permit for the greenhouse from the city, and pouring the foundation took…….considerably longer than I imagined.
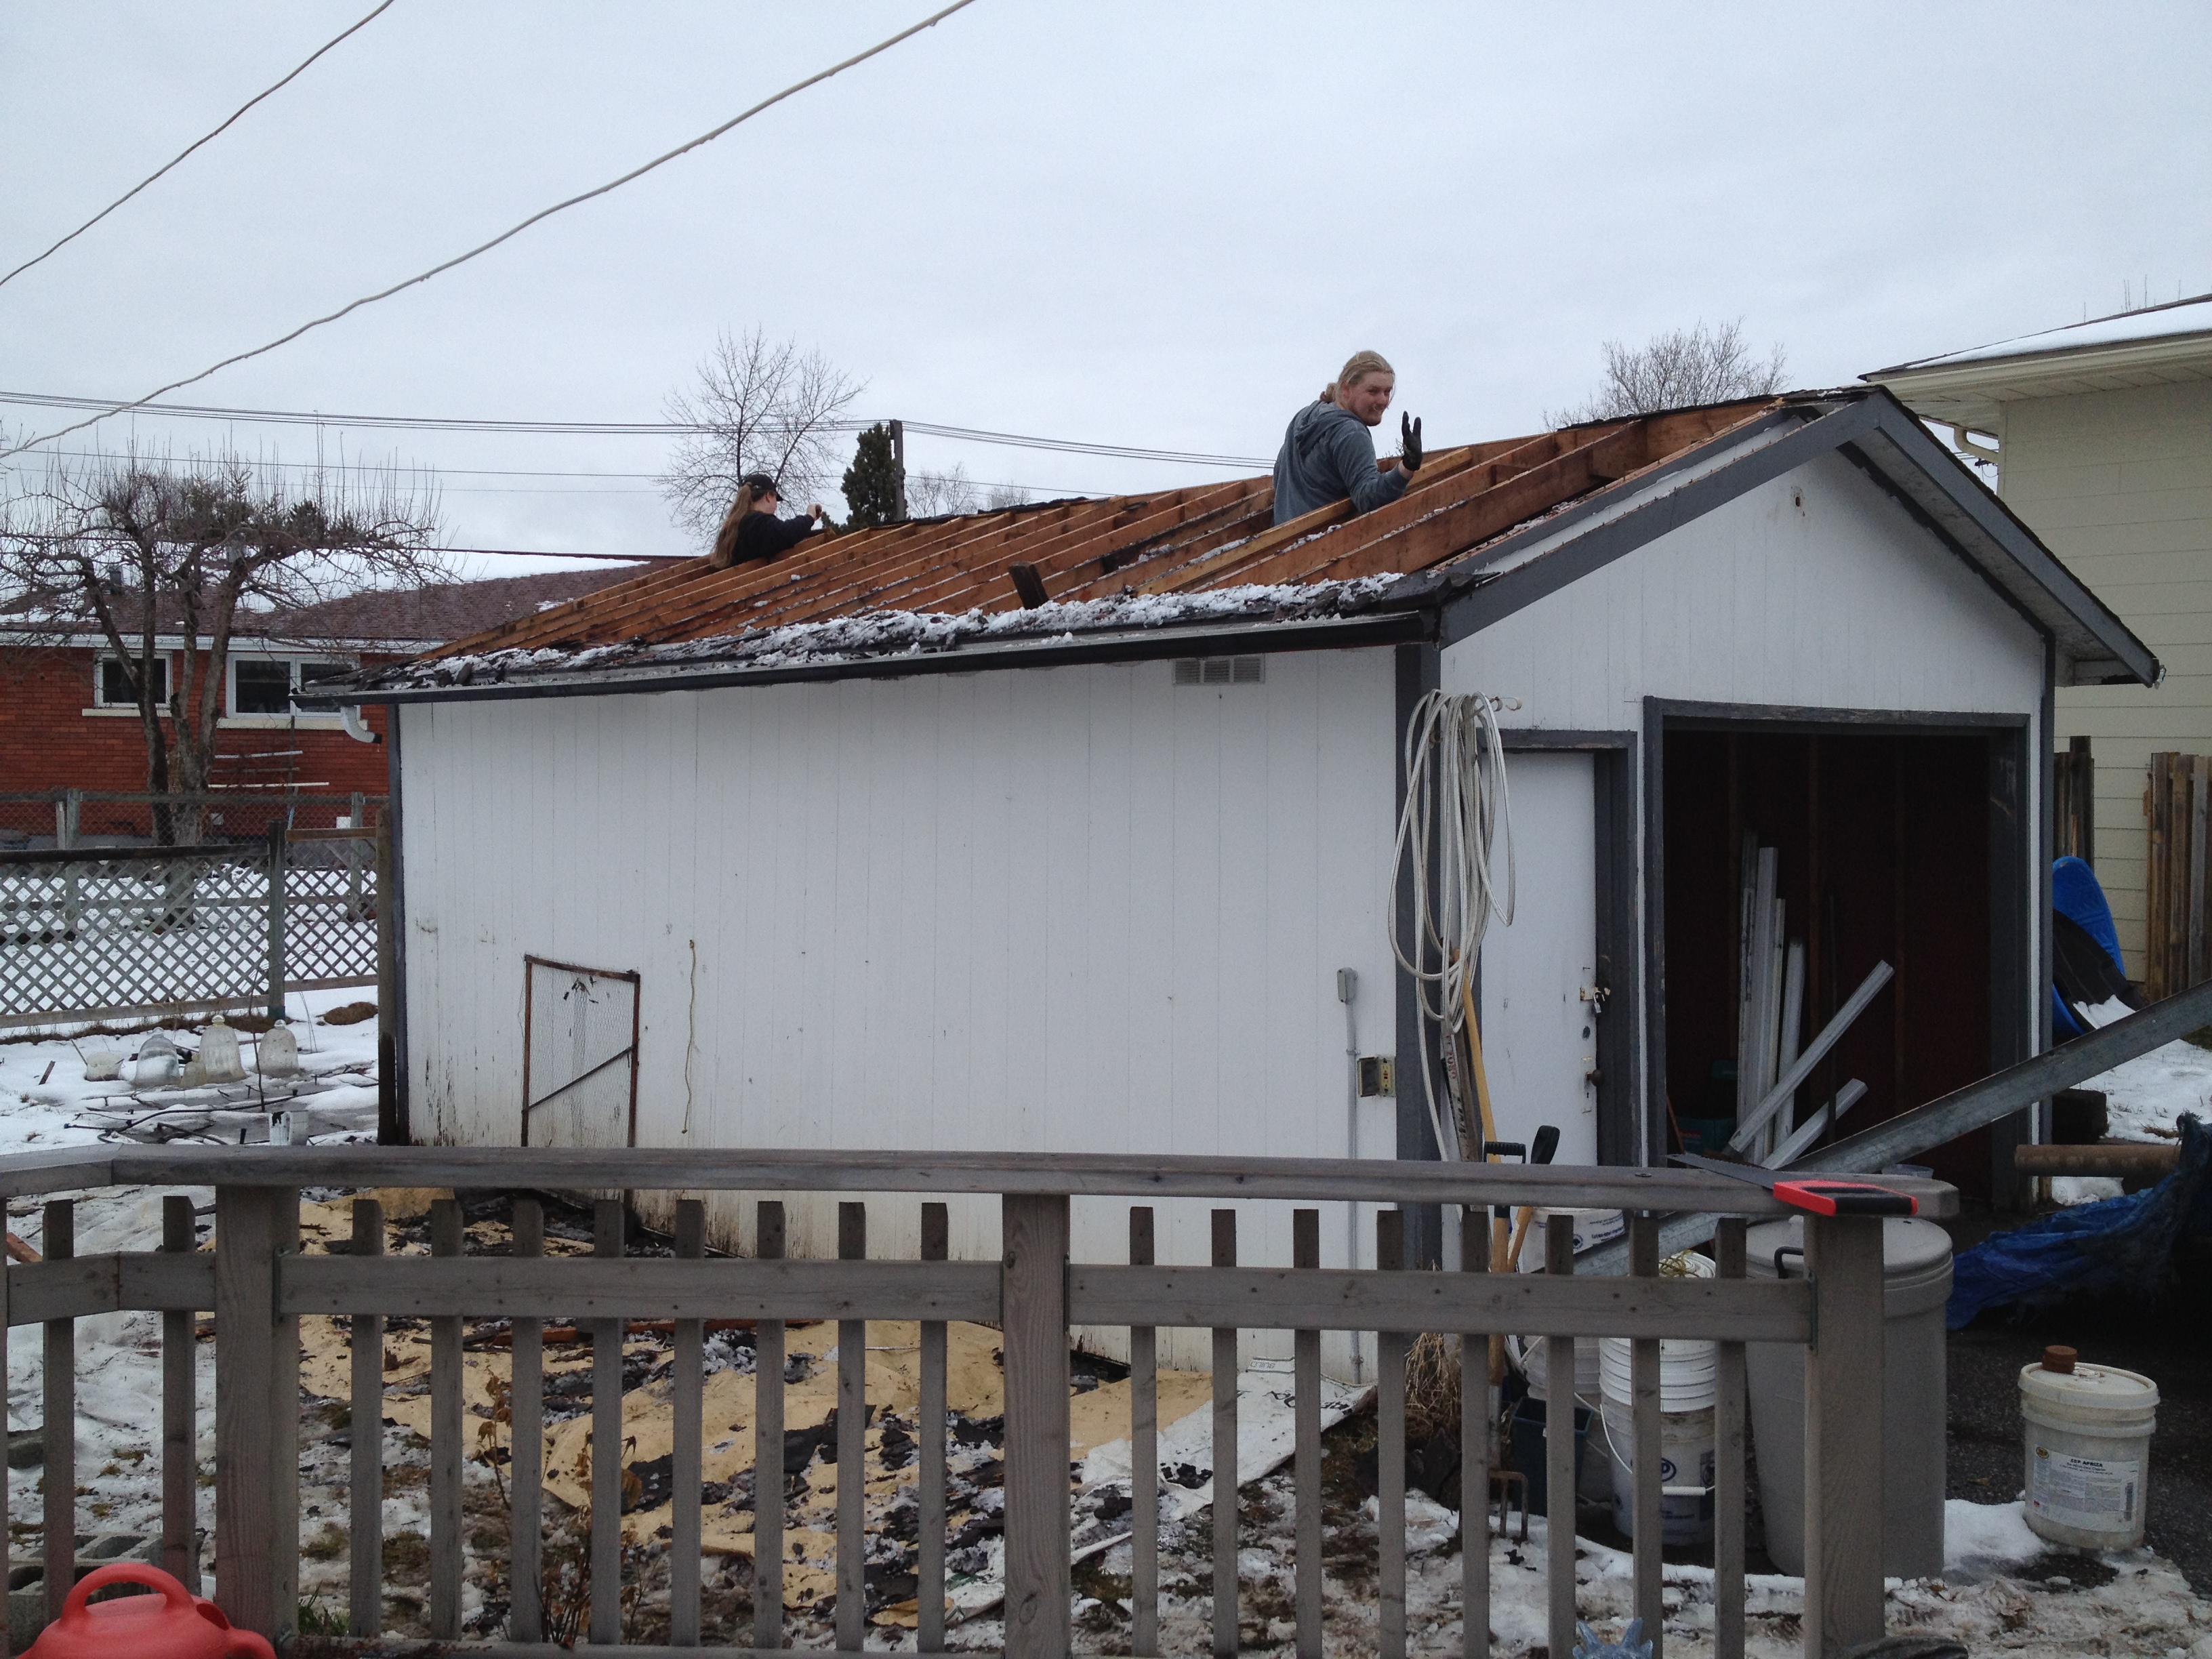
Demolition of the old garage (yes, THAT poor garage-facsimile) was late April 2013, with snow still on the ground. I was excited, and optimistic, ready to spend the entire summer slowly putting it all together. It wasn’t until the end of August by the time I had a permit, and October 16 by the time the slab was poured. Which meant – “Rush-like-crazy-cross your-fingers-and-hope-the-snow-waits”.
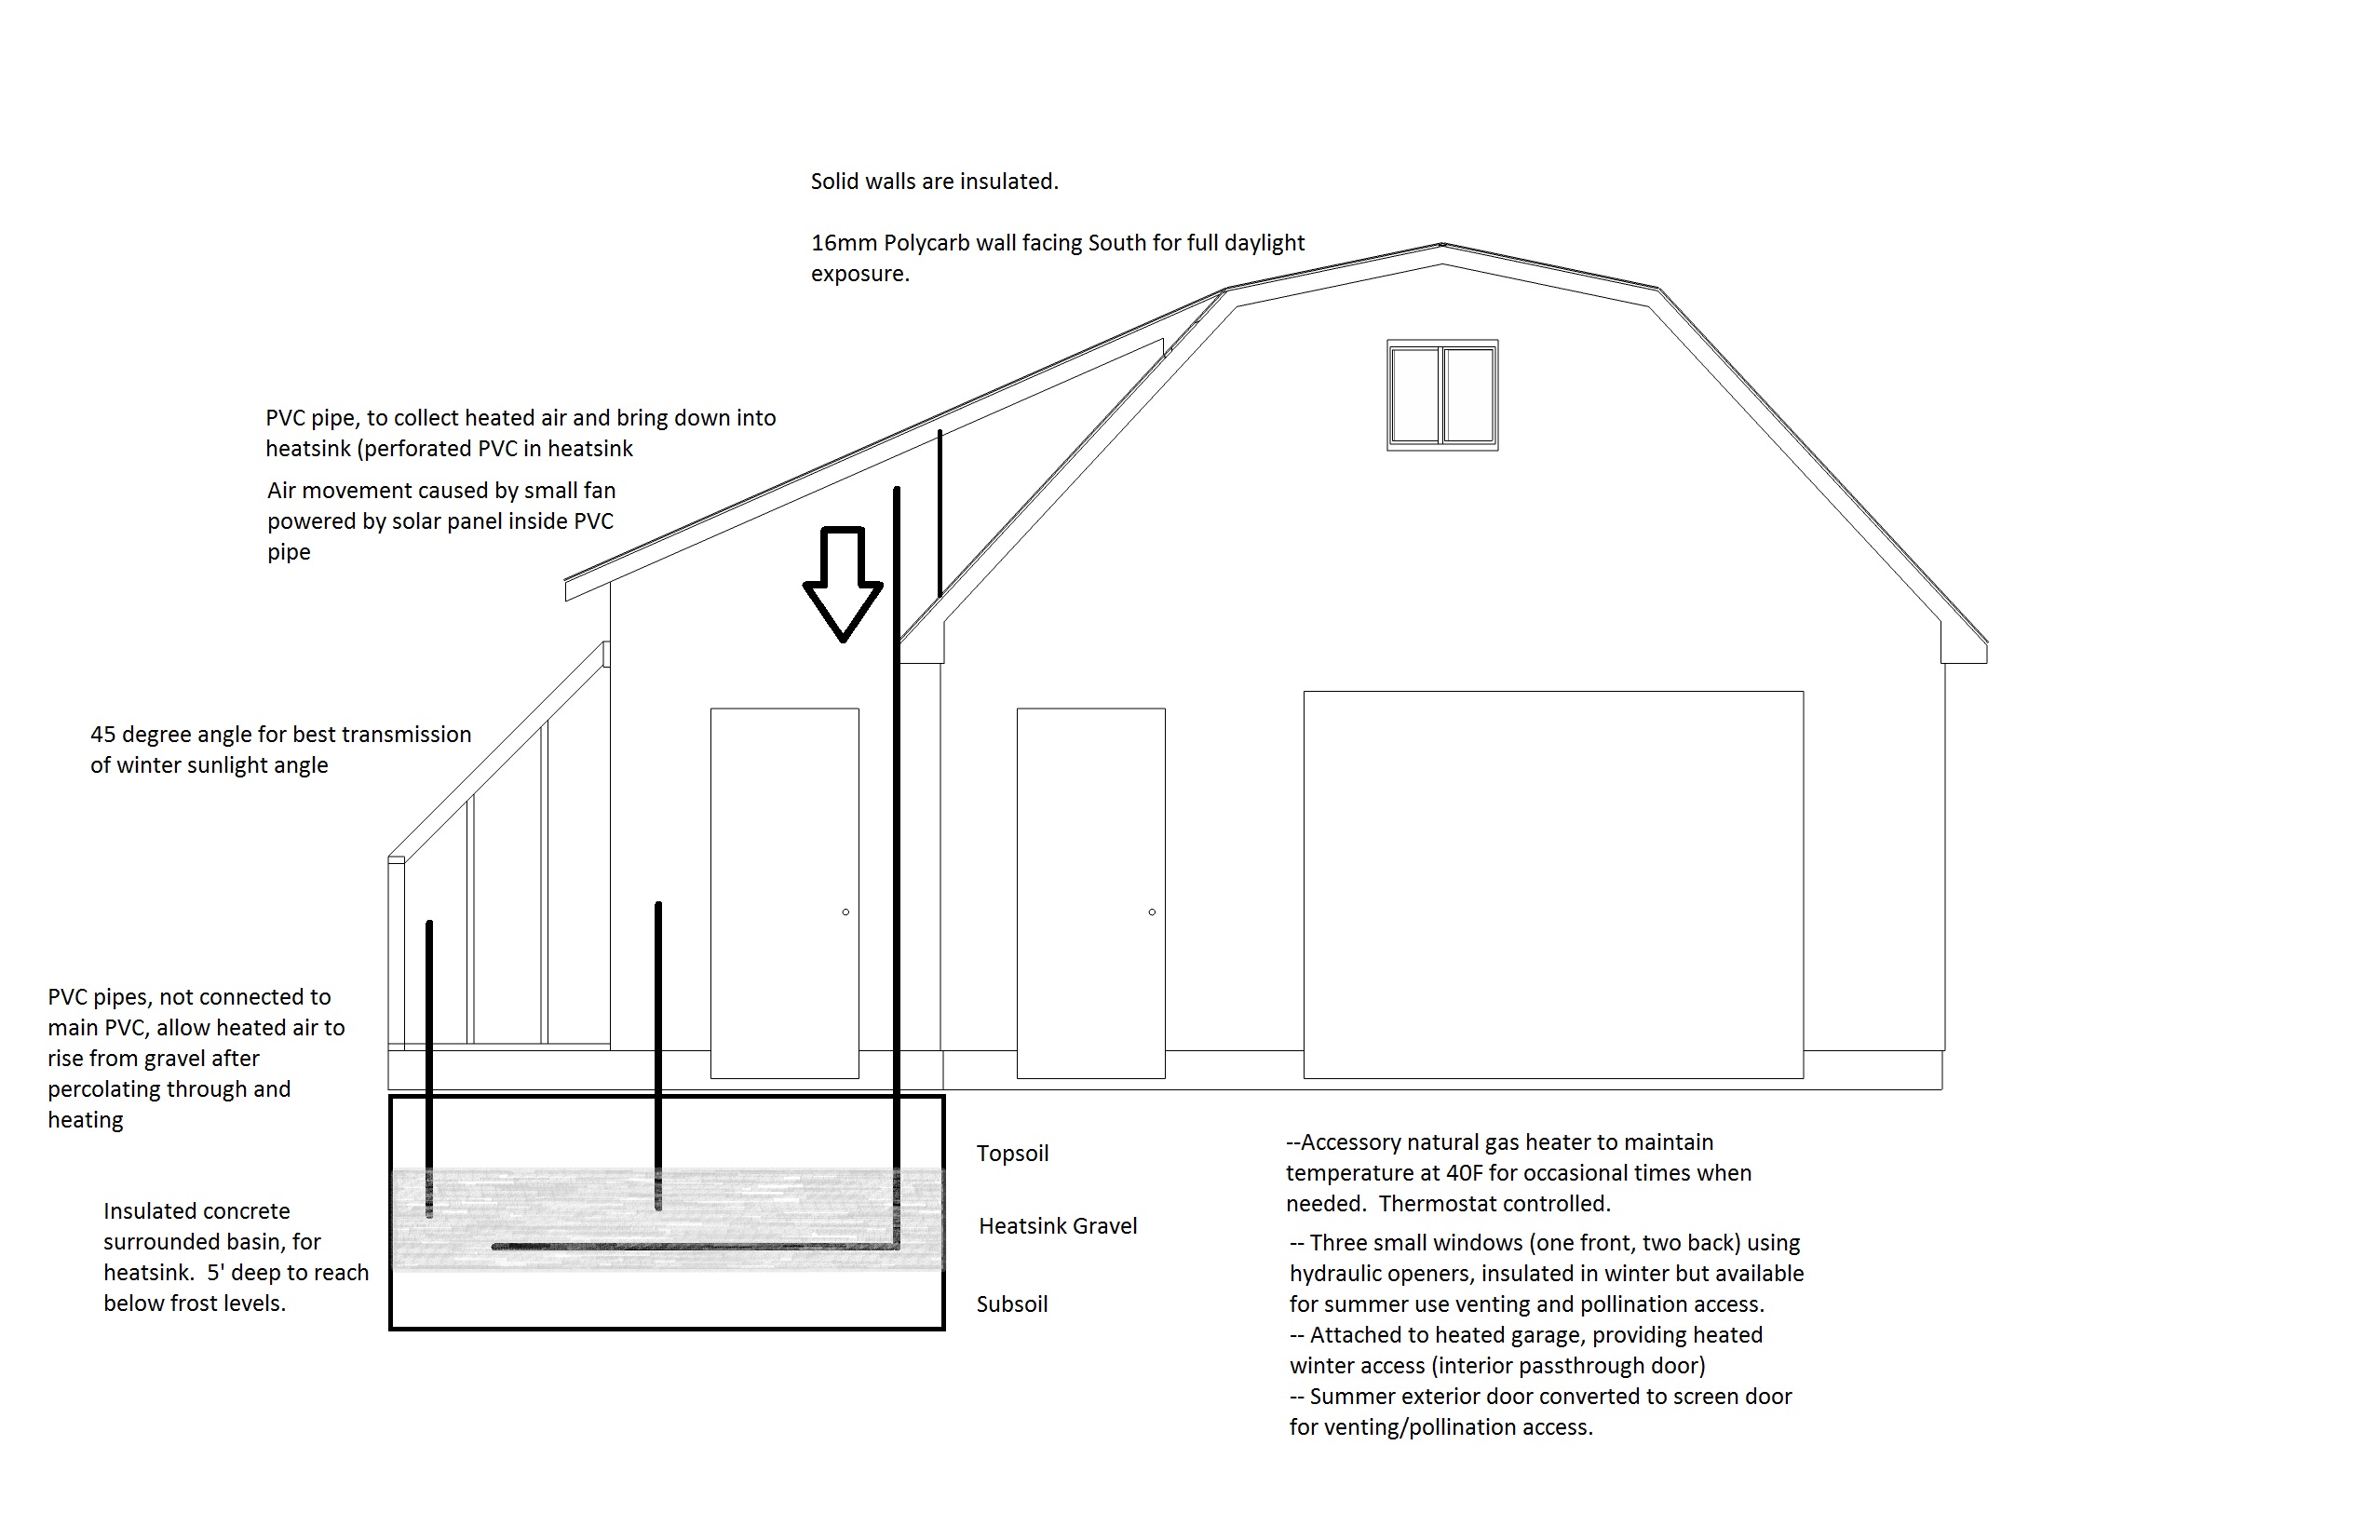
The greenhouse was designed to be as passive-solar as possible throughout the winter months. Which meant it needed a way to hold the heat generated throughout the short hours of sunlight in an effective and efficient way. To accomplish this, a heatsink was designed where heated air from the top of the greenhouse would be forced down to a bed of stones beneath the ground using small dust-booster fans. While the heat was percolating through the stones and heating them during the day, the system would also provide airflow inside the greenhouse using the displaced air. At night, this stored solar heat would slowly rise from the stones to keep the beds warmed.
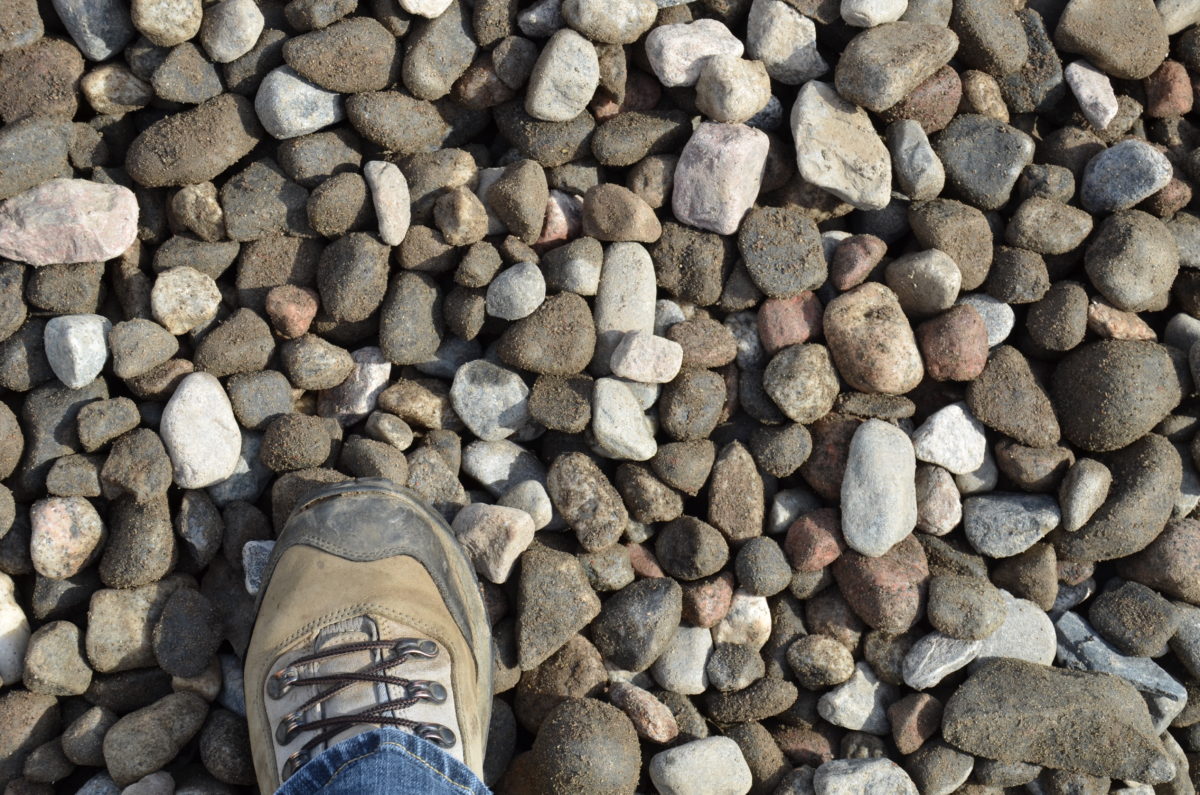
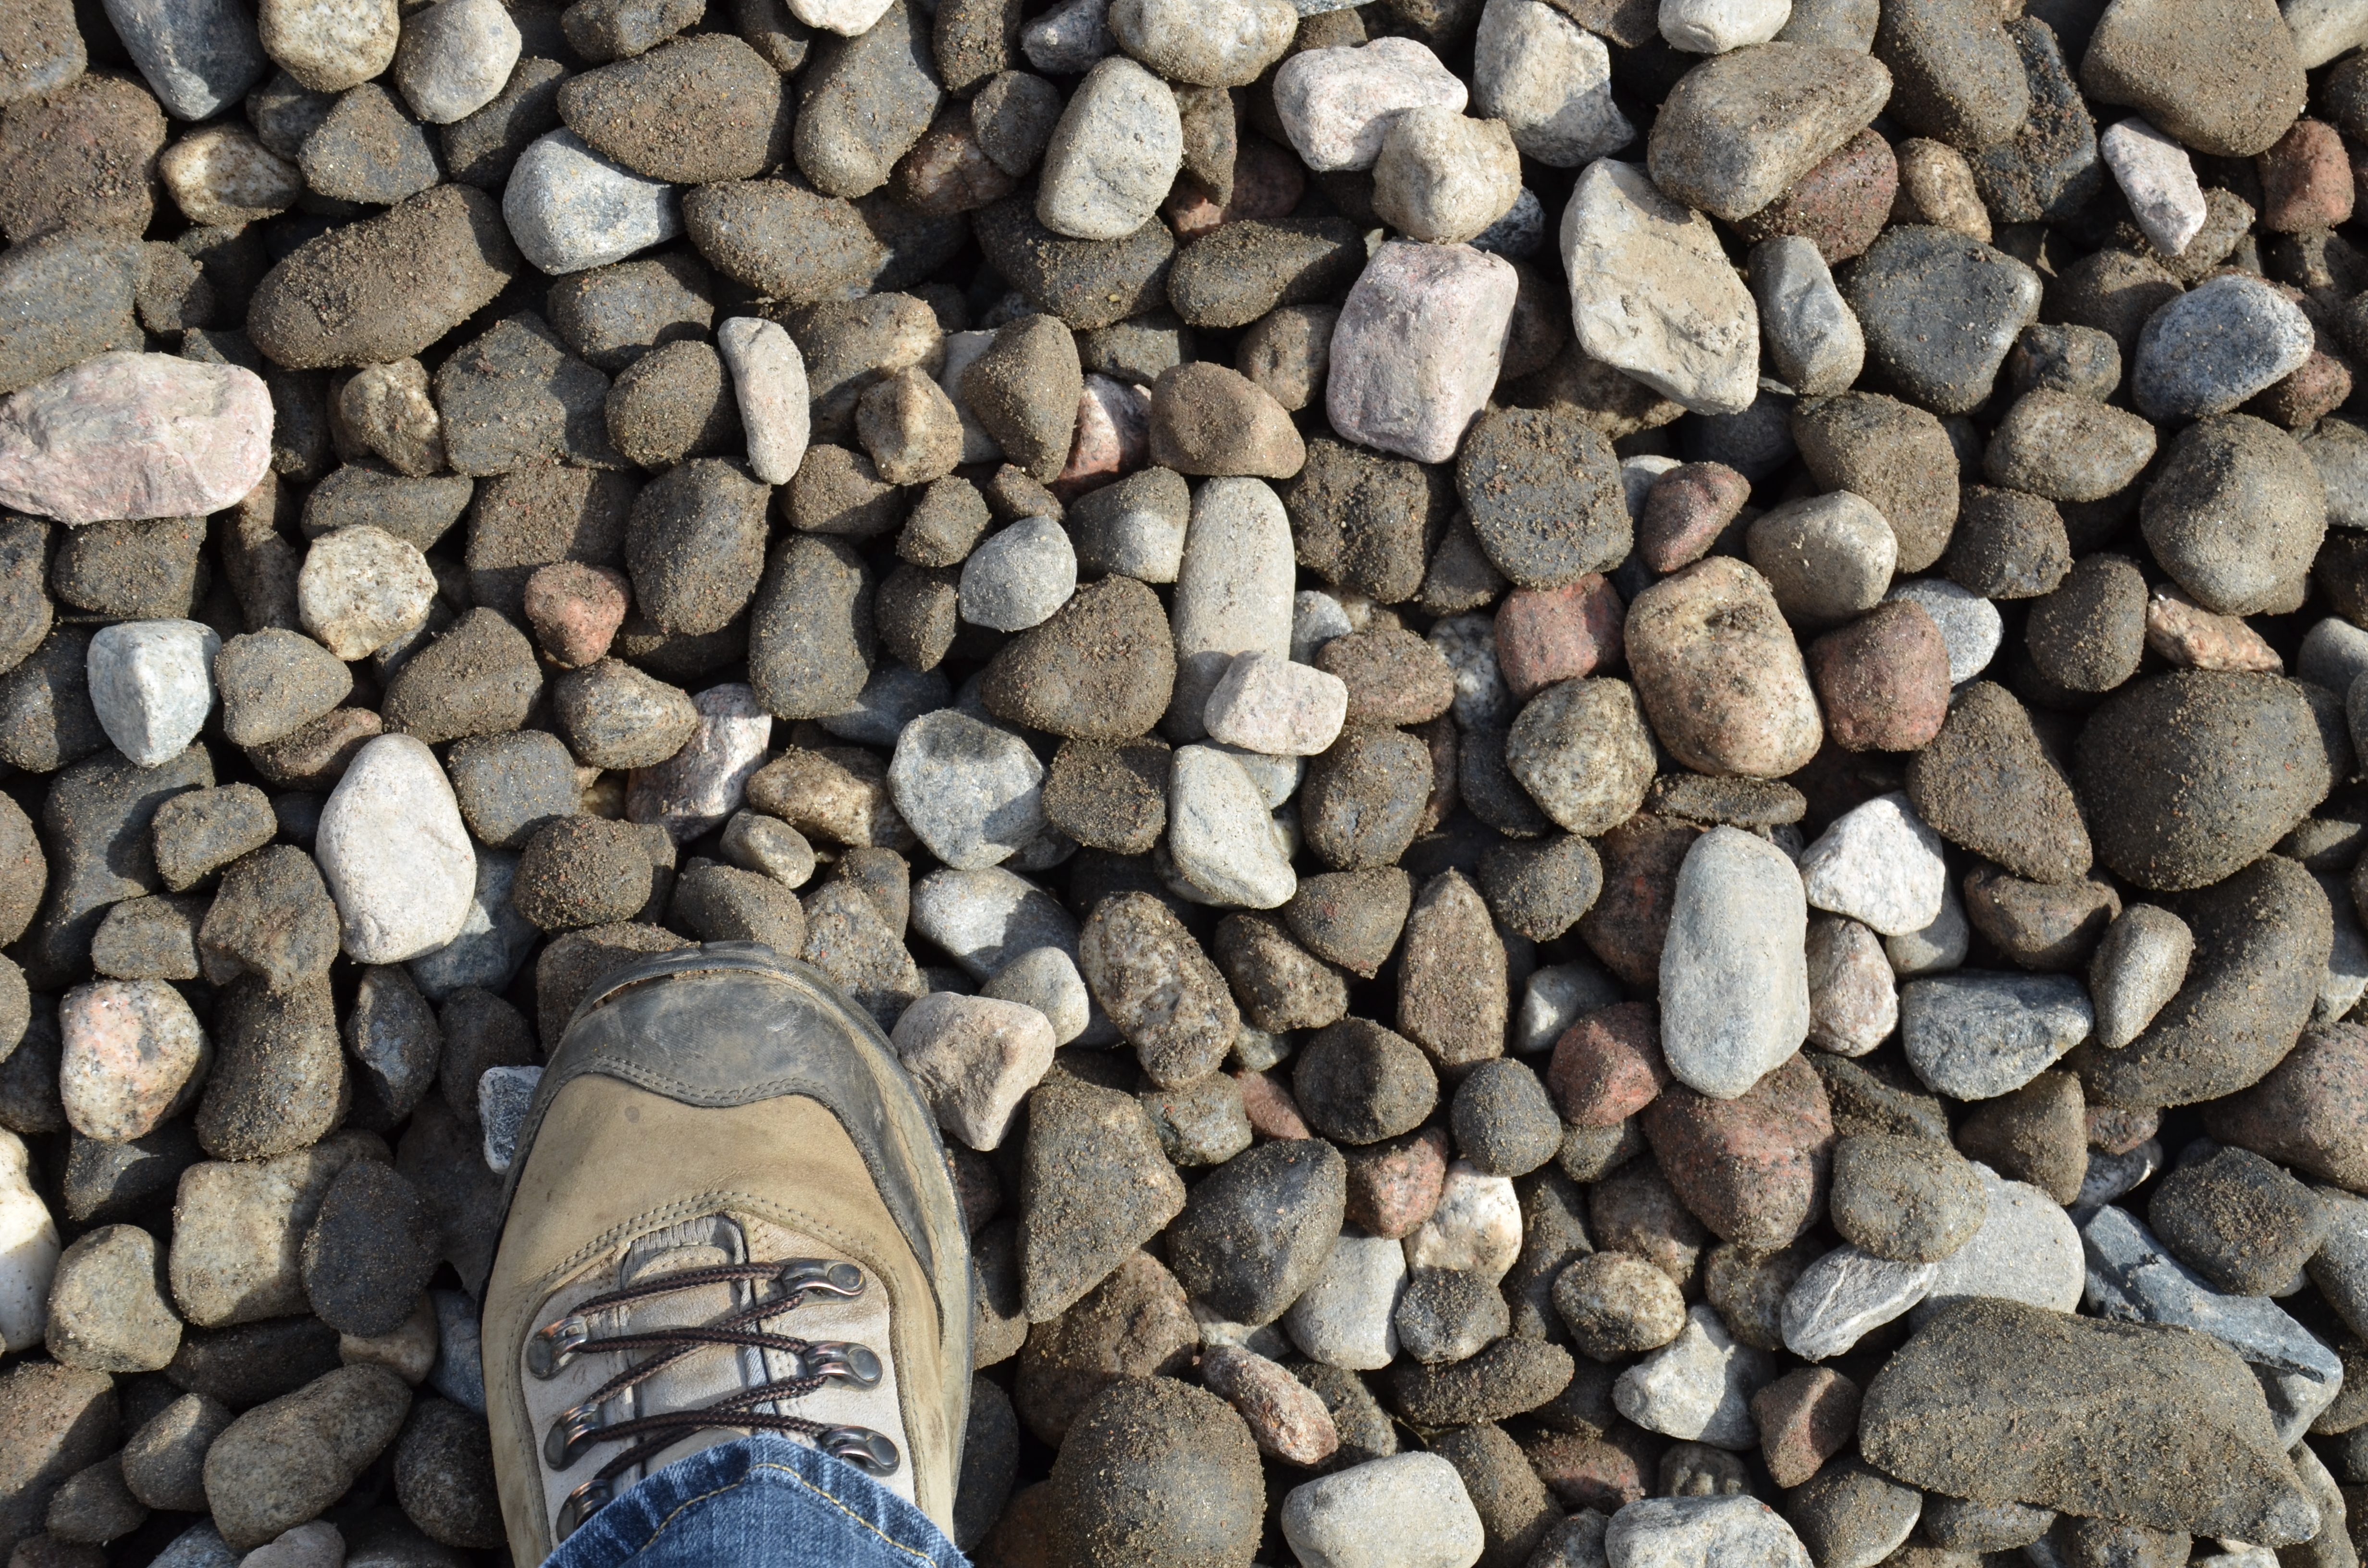
So a pit was dug to reach down to the frost level with insulated concrete walls. This was given a layer of gravel fill, and then a few inches of golf-ball sized stones. The main component of the heatsink, perforated tubing, was placed on the stones in a way to maximize the air dispersion throughout (a design that could resemble two interlocking “combs” which dead-ended). Two free-standing pipes were also placed on the soil, for the air to flow upwards from the stones once it had slowly meandered through. The remaining stones were dropped on these pipes, and then a final layer of topsoil. Between the layers, geo-cloth was used to prevent the stones and soil from mixing, which would have effectively ended the airflow and heatsink functioning.
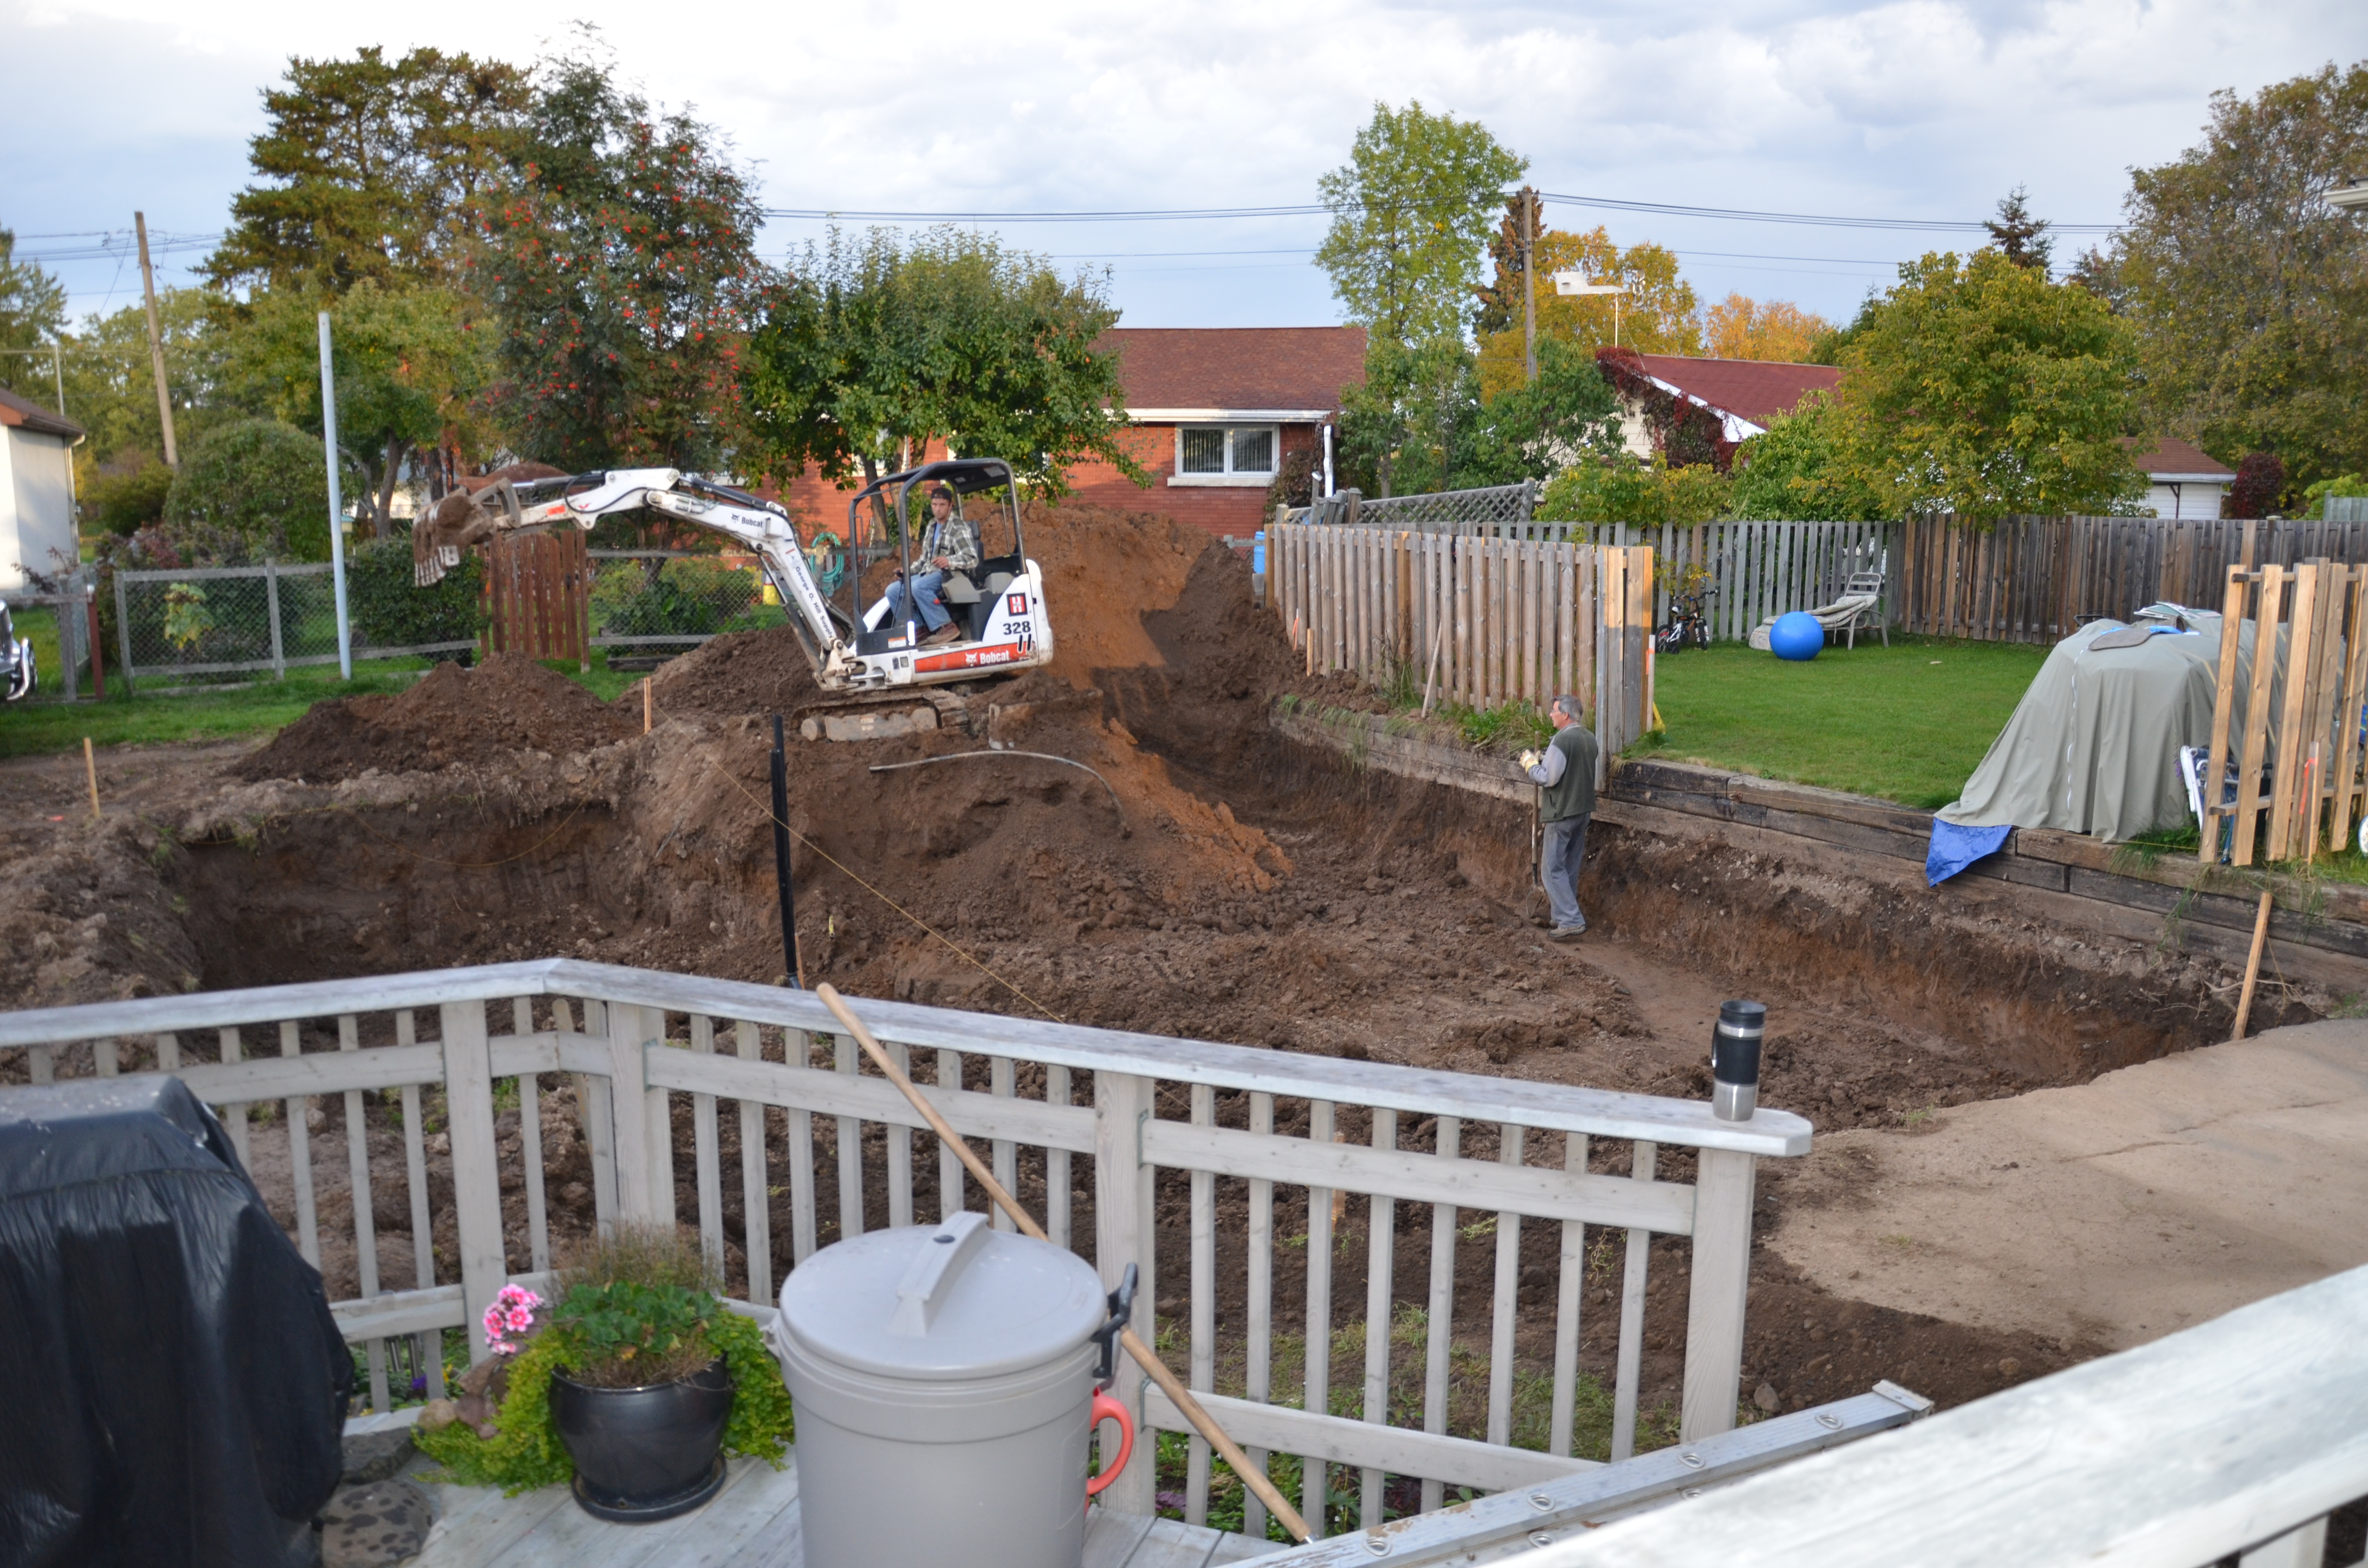
You’ll notice that the heatsink does not extend all the way to the walls of the greenhouse once the final foundation was completed. It was either this, or do a full 5-6 foot foundation beneath all walls of the greenhouse AND garage. So we compromised and “floated” the heatsink within the main support, and I’ll see how this goes :/ I’m nervous that the raised beds that are beyond the heatsink and on thte concrete layer may get too cold, but hey, I could be blissfully wrong. Right??
Needless to say, I did not manage to have the greenhouse ready and functional in 2013. The weather had turned too cold to put up the polycarbonate glazing by the time I had the main garage, walls and supports ready.
Images::
The heatsink walls, insulated and below frost level.

Heatsink Stones – Approximately golf-ball sized.
Partial view of the heatsink pipes beneath a layer of cloth.

Heatsink and the main foundation, waiting for topsoil.

Just curious, were you running that back hoe yourself? IZZIT FUN!?
Nope. Pretty sure they decided that I might somehow smack the neighbors house if they let me, or cause other damage. But it totally looked like fun.
Awesome!! stoked to see more 🙂
Your garden and greenhouse sounds amazing .